Before you read any more I want to inform you that this product is 100% FREE!!
In the web shop you can download all the files needed to create your own nozzles with a 3D printer.
But since most people still do not have access to a 3D printer we are also selling them in our shop.
Our web shop has now moved to it's own server and we keep these pages to provide extra information about our products.
So please click below to visit our shop!

But before buying them from me please be aware that this is still a project in testing phase and the pieces you will be getting are NOT production line quality items.
Also they can't be expected to fit every single airbrush out there either! But you get some tips below on how to make them fit!
You are buying them as a product in Beta stage!
So now you know!!
What you will be getting is three 3D printed (PLA plastic) standard fit nozzles S, M and L and you will also get a M universal fit nozzle with a bag of thermo plastic beads to fit it to your airbrush.

A bit of history behind this project:
In the middle of February 2014 I saw a really cool tutorial on how to use a pencil to create splatter effects with your airbrush.
I really recommend you all to watch it! Not only is he really good at airbrushing but he is very funny too!
http://www.airbrushtutor.com
It seems like this has changed into a pay per view site... So I can't show you the video that inspired me now.
But after seeing it I of course started to think of a way to create a more consistent method that would eliminate how the splatter effects depended on how you could hold the pencil still enough. So I turned to my 3D printer as I always do right now.
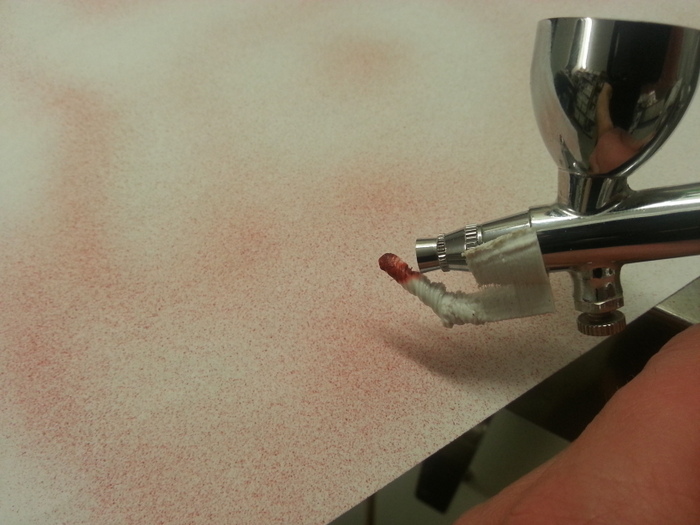
This was the first rough test and I saw some potential here.
I did a number of different tests how to make it create the best splatter effect and the best way to attach it to the airbrush.
I worked on my own “work horse” airbrush which is a no-name standard low cost airbrush.
Working out the prototype on a no-name airbrush was on purpose.
Since no-name brands often use easy to get components I was hoping it would fit a lot of airbrushes.
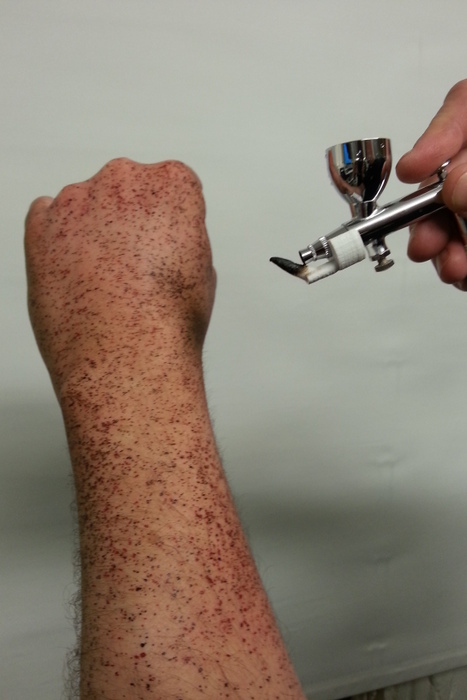
Here you can see me spraying acrylic paint on my own arm with a test version of the nozzle.
On this picture you can see all the details of the airbrush I used in development.
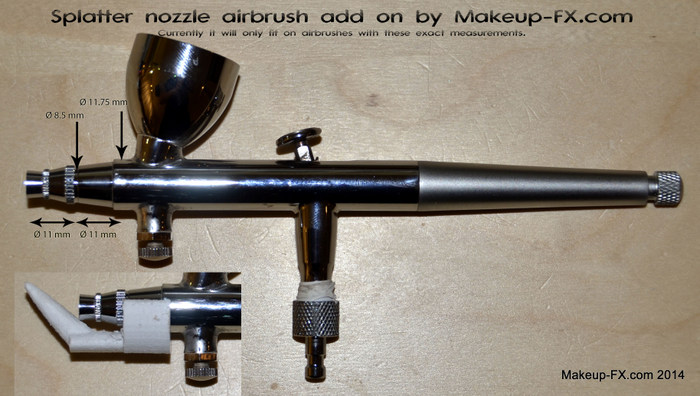
I quickly realised that there are hundreds or maybe thousands of different designs of airbrushes and to make one that fits all of them is impossible.
The nozzle is made with a 3D printer and printed with PLA plastic which is a thermo plastic and will melt if exposed to high heat.
But that also means that if it doesn’t fit your airbrush you can maybe reshape it slightly with carefully applied heat.
What I have done quite often is to take the nozzle and put it into boiling hot water for 20 seconds before taking it out with a pair of tweezers.
Squeeze it on your airbrush and hold it until it is cool.
Then it fits!!
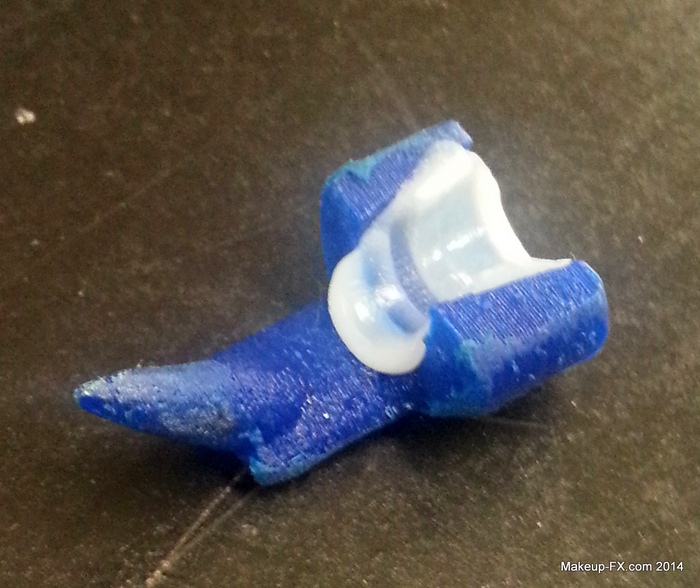
Another great way of customizing it to fit your airbrush is to use pellets of thermo plastic beads.
Take a few of them and pour boiling water on them and leave them until they get transparent.
Then carefully put the molten plastic in the nozzle and push your airbrush into it.
Hold it still until it cools and hardens before popping the airbrush out.
See an example below.
This plastic
normally doesn’t stick to metal but please be careful with you expensive
airbrushes!
I take no responsibility for damages to your airbrush!
The 3D printed PLA nozzle is very resistant to both Ethyl alcohol and IPA.
So
you can use Skin illustrator inks without any problems!
After my first
tests I wanted to find out if the tip size mattered to the splatter size.
And
it did!! So I did an experiment where I sanded the tip down and then the pattern
got smaller.

So then I started making new versions of
the nozzle.
I have now made 4 different versions of it.
All of these can
currently be downloaded for free.
My three standard nozzles S,M and L that
are all made to fit the same airbrush as above.
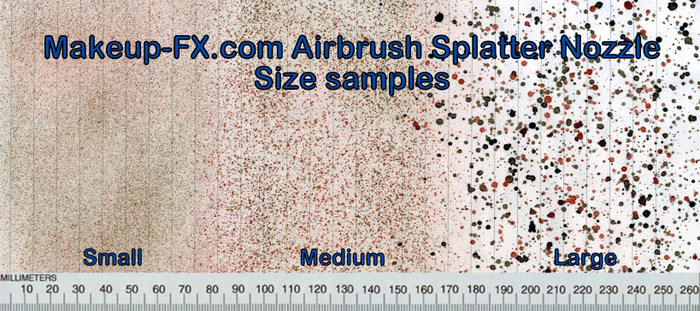
The sizes means the size of
the splatter dots and not the size of the airbrush fitting.
On the
picture below you can see the results of the three different nozzles.
I also
created a “Universal fit model” in size M that is more work for you to make it
fit the airbrush but it fits more airbrushes.
All the way through this
project I was posting pictures of my experiments on Facebook page
https://www.facebook.com/larsfx
I was really surprised at how strong the reaction from people were.
It
seems like people have waited for this type of thing for ages but no-one has
made it.
So at this point I started sending out samples to get more
feedback.
For those of you who want to print the nozzles yourselves here
you are:
DOWNLOAD THE FREE 3D PRINT FILES IN THE SHOP:

You can also buy the finished kits with nozzles there too!

I recommend doing 8 or 10 at the same time. The tips are so thin so
if you only do one it will never have a chance to cool between layers.
Also
I put them like this so there will be less sanding and fixing on the important
side of the nozzle.
If you print them yourself please e-mail me and tell
me the results you are getting.
I hope you will have fun testing it!
Please share your results with me and others!
Thank you!!
Here is one of the first feedbacks I got from makeup artist/author
Todd Debrecini using his Grex
airbrush:

